The SFTP File Connector is managed by Abacus.AI and is used to attach datasets to your project. This connector is ideal for securely transferring files to Abacus.AI.
Please note that if you would prefer to host the SFTP connection yourself, the documentation to set up that connection can instead be found here.
Setup Instructions
Using FileZilla
Troubleshooting Tips
Dataset Creation
Self-hosted vs. Abacus.AI-hosted SFTP connection
- Managed by Abacus.AI.
- Only one SFTP file connector is allowed per organization.
- Multiple key name/SSH key pairs can be added to the connector.
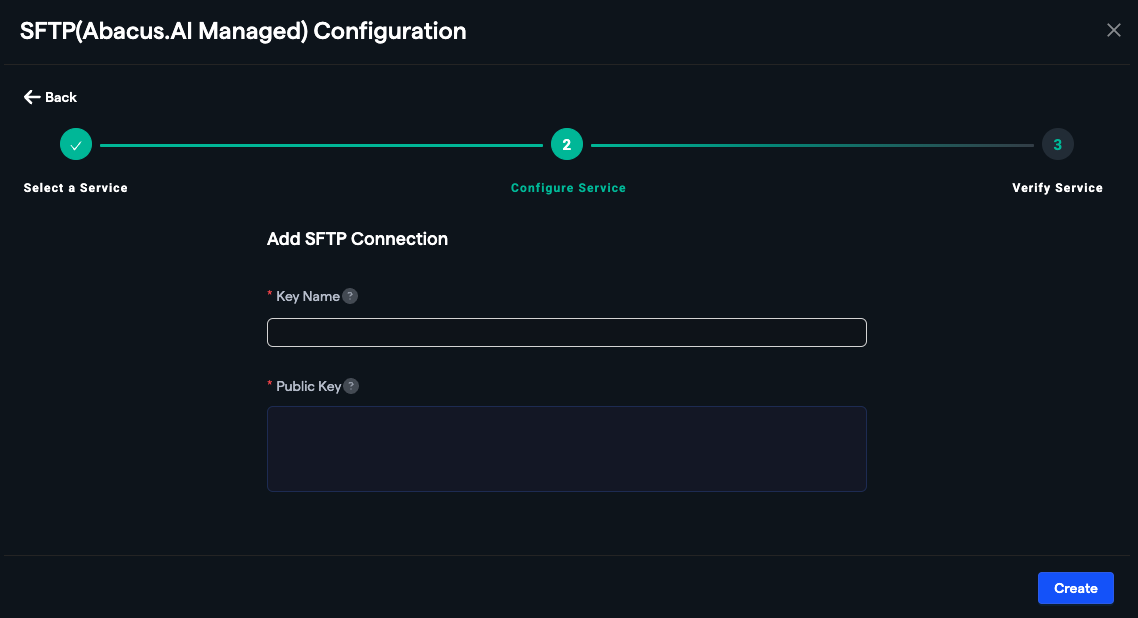
- Add an SFTP File Connector:
- Navigate to the Connected Services Dashboard in the Abacus.AI application.
- Go to the File Connectors tab and select SFTP (Abacus.AI Managed).
- Enter the following details:
- Key Name: A unique name for the SSH key.
- Public Key: The public key associated with the SSH key pair.
- Click Create to add the SFTP bucket.
- A notification will confirm the successful addition of the SFTP connector.
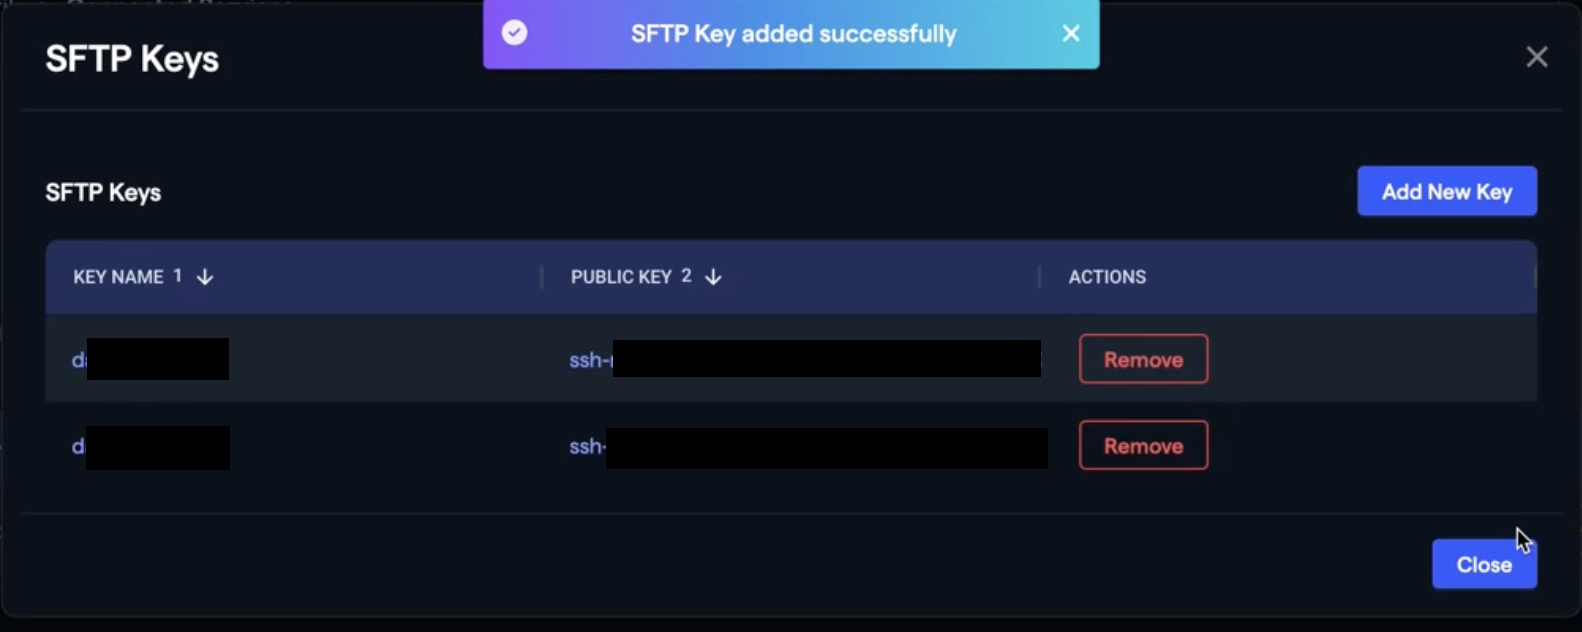
- Manage SSH Keys:
- Access the Manage Connectors page to view and manage existing keys.
- To add a new key:
- Click Add New Key.
- Enter a unique Key Name and the corresponding Public Key.
- Click Save to add the key.
- A notification will confirm the successful addition.
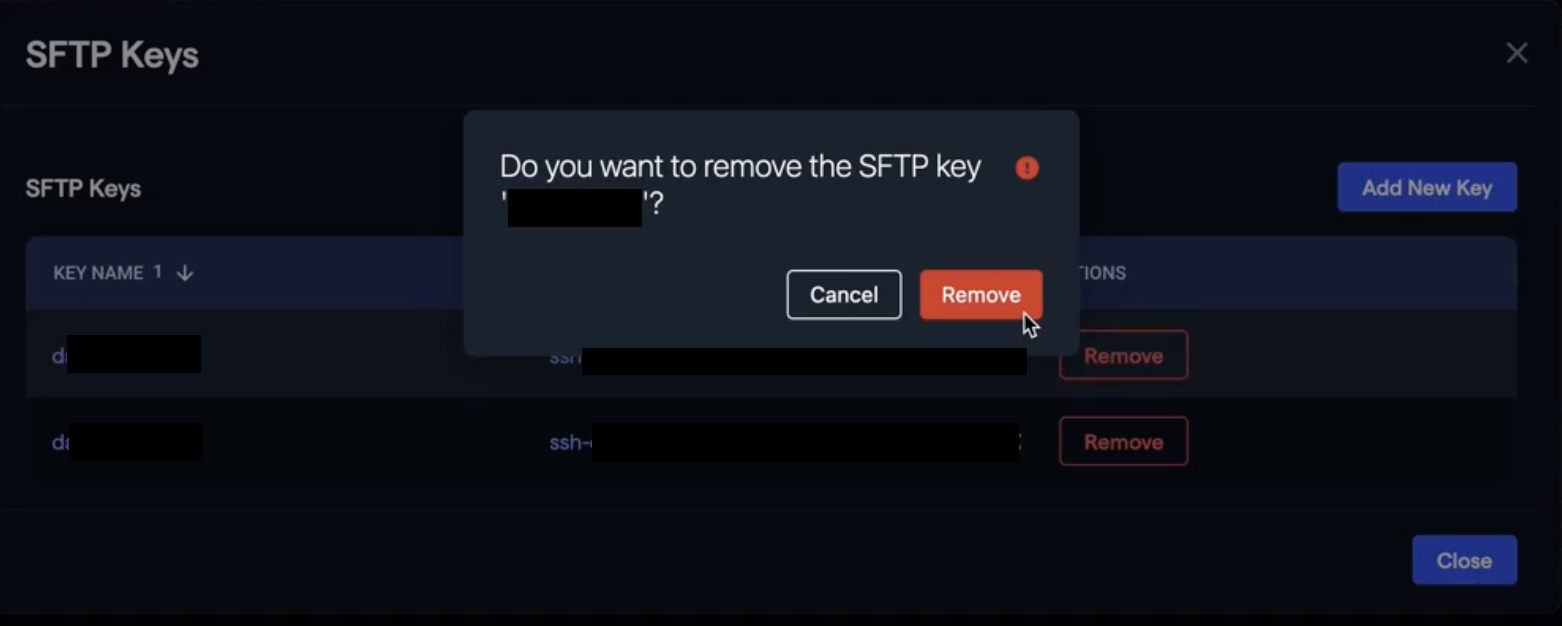
- To delete a key:
    - Click the **Remove** button next to the key.
    - Confirm the deletion in the dialog box.
    - Verify the key is removed via the notification.
- Remove the SFTP File Connector:
- Navigate to the Connected Services Dashboard.
- Click the Remove button next to the SFTP bucket.
- Confirm the removal in the dialog box.
- A notification will confirm the bucket has been removed.
The SFTP File Connector managed by Abacus.AI is ideal for securely transferring files to your project. This guide provides step-by-step instructions for configuring FileZilla to upload files to your Abacus.AI-managed SFTP storage using an SSH key.
- You have already added an SFTP File Connector in the Abacus.AI application and have the following details:
- SFTP Hostname
- Port (default is 22)
- Username
- Private SSH Key (corresponding to the public key added to the SFTP File Connector)
- FileZilla is installed on your system. You can download it from FileZilla's official website.
-
Open FileZilla:
- Launch the FileZilla application on your system.
-
Add Your Private Key:
- Go to Edit → Settings.
- In the left-hand menu, select Connection → SFTP.
- Click the Add key file... button.
- Navigate to the location of your private SSH key file (e.g.,
id_rsa or .ppk).
- Select the file and click Open. FileZilla will automatically convert the key if needed.
-
Set Up a New Site in Site Manager:
- Go to File → Site Manager.
- Click New Site and give it a name (e.g., "Abacus.AI SFTP").
- In the General tab, configure the following:
- Protocol: Select SFTP - SSH File Transfer Protocol.
- Host: Enter the SFTP hostname provided by Abacus.AI.
- Port: Enter the port (default is 22).
- Logon Type: Select Key file.
- User: Enter the username provided by Abacus.AI.
- Key file: Browse and select the private SSH key file you added earlier.
-
Save and Connect:
- Click OK to save the configuration.
- In the Site Manager, select your newly created site and click Connect.
-
Navigate to Your Local Files:
- In the left-hand pane of FileZilla, browse to the folder containing the files you want to upload.
-
Access the Remote Directory:
- In the right-hand pane, navigate to the desired directory in your Abacus.AI-managed SFTP storage.
-
Transfer Files:
- Drag and drop files from the left-hand pane (local) to the right-hand pane (remote) to upload them.
-
Verify Upload:
- Ensure the files appear in the remote directory after the transfer is complete.
- Key File Issues: Ensure your private key is in the correct format. If you encounter issues, use PuTTYgen to convert your key to
.ppk format.
- Connection Errors: Double-check the hostname, port, username, and key file path in your Site Manager configuration.
- Permission Denied: Ensure the public key associated with your private key has been added to the SFTP File Connector in the Abacus.AI application.
For additional help, refer to the FileZilla Wiki or contact Abacus.AI support.
- Navigate to the Datasets tab in your project and click Create Dataset.
- Select Create New and provide a name for your dataset.
- Choose Read from External Service and select your SFTP File Connector.
- Specify the file path or folder in the SFTP bucket where your data is stored.
- Configure the schema mapping and proceed to upload the dataset.
- Once uploaded, the dataset will be available for training models.
Like any other file connector, once your SFTP connector is set up, you can bring your data to Abacus.AI from your SFTP storage by referring to the Fetch data from File Connectors document.
| Connector Type |
Use Case |
| SFTP File Connector |
Use when connecting to an SFTP bucket provisioned and managed by Abacus.AI. |
| SFTP Application Connector |
Use when connecting to your own SFTP server for custom data integration. |